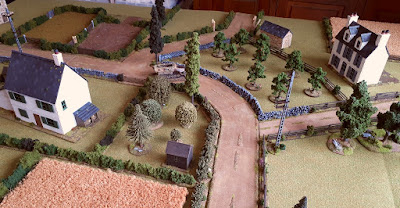
A change is as good as a rest - or so the saying goes... It's been all Sharp Practice here on the table recently so Orange Dave and I decided to have a big(ish) game of Bolt Action. It's 1500pts per side, so fairly busy for my little 6 x 4 table. We agreed to play the mission "Top Secret". The wrecked 251 is in the centre of the table and contains a dead senior German officer with a bundle of very interesting papers, maps, etc. Here's a couple of pics I took whilst awaiting Dave's arrival (thanks to all my FB chums for the kind words when I posted these on Saturday afternoon).

Those pics weren't too bad, but I must apologise for some of the rest of the photos as they're not as good as I'd hoped. The lighting in my lounge plays havoc with my camera.
For this scenario all troops begin the game as reserves but can deploy from turn 1, following a successful Commad check. My two platoons gave me a total of five Grenadier squads (4 regulars and 1 veteran) and the scenario states that only infantry can claim and carry the objective, so I pushed as many chaps towards the objective as I could.
In the pic above you can see that Dave has a Churchill. Seeing this I deployed my own armour (Panzer IV and a Stug) as soon as I could.
Here are a couple of shots of Dave's line. He also has two tanks (partnered by two Bren carriers) along with plenty of infantry behind those hedges.


Turn two and first dice out of the bag is a German dice. I push my Stug around the farmhouse where it has a good line of sight to the flank of the Churchill... Bang! A lucky shot causes maximum damage and the great armoured beast brews up spectacularly!

In the centre I push my men (perhaps somewhat recklessly) forward to grab the secret papers. Dave is a little more cautious, using the the farmhouse as good cover. His shooting really hammers the lead German squad who take several casualties and accumulate 4 pins. Ouch!
On the British left flank, a shot from Dave's Stuart bounces off the Panzer IV's formidable front armour. In return the Panzer IV takes out the Bren which had moved up to screen the allied tank.
Turn three saw the Germans get closer still to the 251, but the closest squad was just too shot up to get moving. Two other squads are now poised to jump over the orchard wall and get the secret dossier.
 Dave has brought on a truck full of angry Kiwi nutters. Best try to keep them at arm's length! How many times have my poor Germans been shredded by those fearsome veteran antipodean soldiers. In this turn Dave also calls in the artillery support. Now why did I put all those chaps in one place...?
Turn four and "Boom!" in comes the allied artillery. The marker is the skull token at the base of the tree in the pic below. Mercifully Dave rolls a 1 for the D6+6" radius. The kubelwagen and the CO (my planned "snatch squad" to get the dossier off table asap) take direct hits and are obliterated whilst the squads and the tank pick up a heap of pins.
As turn four ends the situation (see pic below) is getting pretty chaotic. The Kiwis have de-bussed, the Stug blasted them (to almost no effect), the badly pinned Grenadier squad passed its morale check and reached the objective. Plus another squad has moved up the road to try to help. Across the table troops converge on the centre!

Turn five starts in fine style. As with turns 2, 3 and 4 there was quite a bit of tension as to which side's dice would be first out of the bag. I *really* needed the first dice so as to get my (still rather badly pinned) squad away safely from the wreck with a firm grip on the secret papers. To my delight it was a black dice... I grabbed 2D6 feeling confident that my chaps, with their tails up, would smartly bring the papers back to German lines... I rolled ... two sixes, FUBAR!

The next pic (with flash due to the shonky lighting in my lounge) shows that the squad decided to leg it as fast as they could - which wasn't very fast as they were in a orchard which we played as light cover and no running. Dave could sense that the squad was still within reach of his Maori-turbo-nutters.

The next dice was also German so I moved the remains of the other squad in the orchard forward to try to hold off the Kiwis but, with their blood boiling, they tore over the wall and slaughtered my Grenadiers, consolidating to a point just behind the fleeing Germans carrying the papers. I cannot tell you how much drama and fun this was creating for us as players!

Turn five ends with the Stug chasing the the Kiwis through the orchard but again barely doing any damage with its MG42, and the Kiwis hot on the heels of the fleeing Germans.

Turn six ... more "first dice" drama and again the Germans get the first dice so I manage to activate the still pinned squad to carry the papers just a little further to safety. The Kiwis have to charge the Officer who has bravely (madly?) stepped forward to try to save his men.

As expected there is another one-sided slaughter and again those angry Maoris consolidated right on to the heels of the Germans.

At the end of turn six we rolled for turn seven and the dice decreed it was game over. Officially a draw then.
But we couldn't stop there!
Turn seven and yet another German dice comes out first! Another morale check and only two pins this time ... but that was it for the Germans as they failed and went to ground. The Maoris closed in and tore them to shreds.

What a game! Full of drama, tension, comedy, heroism and some really cinematic moments. Dave is always a first class gentleman-wargamer, so it was a pleasure to set this game up and play. Thanks matey!


Those pics weren't too bad, but I must apologise for some of the rest of the photos as they're not as good as I'd hoped. The lighting in my lounge plays havoc with my camera.
For this scenario all troops begin the game as reserves but can deploy from turn 1, following a successful Commad check. My two platoons gave me a total of five Grenadier squads (4 regulars and 1 veteran) and the scenario states that only infantry can claim and carry the objective, so I pushed as many chaps towards the objective as I could.
 |
| There's another German squad out of shot to the left... Get the objective! |
Here are a couple of shots of Dave's line. He also has two tanks (partnered by two Bren carriers) along with plenty of infantry behind those hedges.


Turn two and first dice out of the bag is a German dice. I push my Stug around the farmhouse where it has a good line of sight to the flank of the Churchill... Bang! A lucky shot causes maximum damage and the great armoured beast brews up spectacularly!

In the centre I push my men (perhaps somewhat recklessly) forward to grab the secret papers. Dave is a little more cautious, using the the farmhouse as good cover. His shooting really hammers the lead German squad who take several casualties and accumulate 4 pins. Ouch!
 |
| The Germans are almost there! |
On the British left flank, a shot from Dave's Stuart bounces off the Panzer IV's formidable front armour. In return the Panzer IV takes out the Bren which had moved up to screen the allied tank.
 |
| Tank "ping-pong" |
Turn three saw the Germans get closer still to the 251, but the closest squad was just too shot up to get moving. Two other squads are now poised to jump over the orchard wall and get the secret dossier.

Turn four and "Boom!" in comes the allied artillery. The marker is the skull token at the base of the tree in the pic below. Mercifully Dave rolls a 1 for the D6+6" radius. The kubelwagen and the CO (my planned "snatch squad" to get the dossier off table asap) take direct hits and are obliterated whilst the squads and the tank pick up a heap of pins.
 |
| Incoming! |

Turn five starts in fine style. As with turns 2, 3 and 4 there was quite a bit of tension as to which side's dice would be first out of the bag. I *really* needed the first dice so as to get my (still rather badly pinned) squad away safely from the wreck with a firm grip on the secret papers. To my delight it was a black dice... I grabbed 2D6 feeling confident that my chaps, with their tails up, would smartly bring the papers back to German lines... I rolled ... two sixes, FUBAR!

The next pic (with flash due to the shonky lighting in my lounge) shows that the squad decided to leg it as fast as they could - which wasn't very fast as they were in a orchard which we played as light cover and no running. Dave could sense that the squad was still within reach of his Maori-turbo-nutters.

The next dice was also German so I moved the remains of the other squad in the orchard forward to try to hold off the Kiwis but, with their blood boiling, they tore over the wall and slaughtered my Grenadiers, consolidating to a point just behind the fleeing Germans carrying the papers. I cannot tell you how much drama and fun this was creating for us as players!

Turn five ends with the Stug chasing the the Kiwis through the orchard but again barely doing any damage with its MG42, and the Kiwis hot on the heels of the fleeing Germans.

Turn six ... more "first dice" drama and again the Germans get the first dice so I manage to activate the still pinned squad to carry the papers just a little further to safety. The Kiwis have to charge the Officer who has bravely (madly?) stepped forward to try to save his men.

As expected there is another one-sided slaughter and again those angry Maoris consolidated right on to the heels of the Germans.

At the end of turn six we rolled for turn seven and the dice decreed it was game over. Officially a draw then.
But we couldn't stop there!
Turn seven and yet another German dice comes out first! Another morale check and only two pins this time ... but that was it for the Germans as they failed and went to ground. The Maoris closed in and tore them to shreds.

What a game! Full of drama, tension, comedy, heroism and some really cinematic moments. Dave is always a first class gentleman-wargamer, so it was a pleasure to set this game up and play. Thanks matey!
Comments
Post a Comment